Pho - Vietnamese Soup

Pho - Vietnamese Soup
One of our favorite dishes - Pho

Sunday, February 22, 2015

WE BOUGHT A BUS!!


Bus # 1


Our Bus!  <3


Yes...you read right!  We finally bought a school bus and fulfilled a lifelong dream of my husband, David.  He's been talking about buying a bus for as long as I've known him, which is going on 30 years.  

I will be switching gears back and forth between posting recipes and posting all the progress we're making on our new, old home...our newest member of the family...our beloved bus.  

The catalyst that made this dream come into fruition is that the Grateful Dead announced their last 3 shows together and they play in Chicago July 3 - 6.  In addition to the bus, it has been a dream of ours to tour with the kids around this beautiful country in which we live.  Now is the time too, before our girls graduate college and start careers and families of their own.  And Dylan will be heading off to college in the blink of an eye as well.  David has decided to take off a month or so, so our "Jamily," can have a fun-filled, family vacation.  A side note is our friend, Treavor came up with the name Jamily for the 5 of us crazy McQuaids....which, I must say suites us all quite well.  :-) 

The process started with us looking at an old '79, 40-foot commuter bus that was outside of Austin.  David and I drove the nearly 3 hours to check it out.  A little interesting tidbit about the owners of this bus is that they're expecting their 17th child...his wife is only 38.   He's a pastor at a Baptist church and his wife home-schools all their children.  It makes me tired just thinking about that.  Anyway, the kind pastor proceeded to show us this behemoth of a bus.  What attracted us to this bus initially is that it had all the bells and whistles...or so we thought.  The kitchen has all the appliances including a washer/dryer combo...I was sold on this bus right then and there.  It also has a full bathtub with shower and nice sizable sink.  The bathroom connect the bunk room that houses 4 bunks to the "master" that has a queen sized bed.  It had some major work that would need to be done but the configuration is do-able, as we we're planning on gutting the whole thing and starting with the bare bones.  It was a bit concerning when he started off by telling us we'll have to let the bus warm up for at least 15 minutes.  The pastor then walked behind the bus where he had part of the exterior that was "cattawhompusly" rigged and wired shut.  The exhaust was moved from facing the bottom, as is usual, to facing upwards and in an awkward location no less.  None of the windows opened...I could go on and on.  The pastor explained to David that there is no fuel guage so you have to knock on the tank to get a feel for what the level might be...he told us "...it's always better to be on the safe side."  Now came the moment of truth, it was time for David to do the test run.  The pastor got the bus out onto the main road as it is a challenge getting the bus out of their white, picket fence.  I was following in David's car as the exhaust was spewing fumes from the back of the bus.  Not even 5 minutes into our test run, David had to pull over so that the pastor could add 2 containers worth of oil.  We try it again and not much longer we had to pull over again because the bus needed anti-freeze as well.  The plan was to take the bus to a mechanic that David found about 30 minutes from the pastor's house.  After winding and weaving around in the tightest of service roads of whatever highways, with concrete barriers due to construction on either side of us...David amazed me with his ability to maneuver the bus as well as he did.  There's no way I could've done that.  One of the most funny visuals of my lifetime was David behind the wheel of this massive bus, looking like Lily Tomlin's bit where she's on the huge rocking chair with her feet hanging off...David's right foot barely was able to touch the gas pedal as the left one dangled in the air.  Hilariousness!  

Anyway, we FINALLY found the mechanic's place of business and David took out their make-shift mailbox while trying to turn into their driveway.  Not bad for his third or fourth time driving a vehicle that size.  We decided to leave the bus there overnight and dropped off the pastor before venturing back home.  During the drive home David and I were discussing the bus and we finally came to the conclusion that this was not the bus for us.  David has always envisioned converting a school bus into an RV.  This was a 40 foot long, 14 feet high beast.  We both agreed that was not our bus.

The following week our 15 year old son, Dylan found a 1990 35-foot school bus on Craigslist, which is totally what David had in mind. I however, was not too sure.  It was in Shreveport, which also is about a 3 hour drive.  We rented a car at the airport so if this was the bus for us that we could enjoy the maiden voyage together.  Super nice guy showed us his bus that he, himself converted into an RV.   Brad, the owner, truly put his blood, sweat and tears into this bus.  He and his 4 year old daughter loved taking road trips together during the 4 years he had it.....his wife was not a fan.   After a test drive we decided this is our bus.  Brad was quite sad as we drove off, which made us sad and now I totally get that.  We miss our bus and it's only been in Denton for her makeover for 2 weeks.

A major item that needs immediate attention is the wiring.  It's a little scary because it was wired with extension cords throughout   There's no plumbing as of yet, but we really like the configuration Brad has working.  We knew we would be pumping some money into our new vacation home on wheels to get it just the way we want.  A lot of the windows are covered, which we plan on exposing all windows.  As best we can tell at this point, it will end up comfortably sleeping at least 8 people.  There's a table with 2 benches that makes into a bed.  There's a futon-like sofa that also makes into a bed.  We're hoping to reconfigure the bathroom so we can add a shower in addition to a toilet, etc...  The kitchen already has a brand new small frig and decent cabinet space.  We hope to extend the counter just a bit and add some drawer space and butcher block counters.  I will use my trusty toaster oven to cook in and we will have a 2 burner, induction stovetop installed as well.  Beyond the kitchen is the bunk room that sleeps 3 and we will add a dresser to help with our lack of storage  The very back is big enough to fit a queen-sized bed perfectly.  We would like to try and push the wall back between the bunk room and "master" so that we will have a little more wiggle room. 

David had the biggest smile on his face the whole way home.  We pull up to our house in the Park Cities with our old, silver school bus with "PANTHER PRIDE RUNS DEEP" boldly displayed on both sides of our vacation home.  We enjoyed her for our first weekend before taking her to Denton to begin the transformation and address any and all mechanical issues.  Of course, David and I head out the following Monday to drop her off and she wouldn't start.  Oh yes, I forgot to mention that a screw driver is the key Brad gave us.  David tried to jump start it with his car only to have the jumper cables melt.  Luckily we already had our bus insured so we were able to use road-side assistance.  We finally got to Denton and dropped our newest baby off.  Almost 2 weeks into it, they've done a lot of the mechanical stuff, replaced tires, oil, hoses... the works.  This week we get to go up and discuss what we have in mind for the interior.  The shop it's at is an RV dealer and they've never converted a school bus before.  How much different can it be from upgrading an RV?!  I guess we're about to find out.  Wish us luck!  To be continued...

Tuesday, July 29, 2014

Shabu-Shabu


David's and my newest food obsession is Shabu-Shabu.  Our first encounter happened when we stumbled upon a restaurant in Plano called Mister Shabu-Shabu.  It piqued our interest enough to where we tried it at home and now we've perfected our own version of this fun and fabulous new find of ours.

Shabu-Shabu (also spelled shyabu-shyabu) is a Japanese dish featuring thinly sliced beef traditionally boiled in water or dashi (which is a type of broth), both made with konbu or kelp.  However, we use beef broth because we haven't had much luck with the customary bonita flakes and kelp method to start the broth, ours didn't turn out flavorful enough.

This delicious dish was originally made with thinly sliced beef, but some versions use pork, crab, chicken, lamb, duck or lobster.  Typically, rib-eye steak is used and is what we prefer.  Shabu-Shabu is served with a variety of vegetables including Napa (or Chinese) cabbage, onions, carrots, an assortment of exotic mushrooms and tofu...of course you can add any vegetables that you like.  In addition to all the wonderful veggies it is served with noodles.  I like udon noodles because they hold up better, but you could use rice noodles or any kind of noodle you want.

The dish is prepared by submerging a thin slice of meat or vegetable in a pot of boiling dashi or broth.  We use an individual burner so that we can control the temperature just perfectly and also so that we can serve it as is customarily done, which is in the middle of our table, kind of like fondu.  Just be super careful, the broth can get very hot.  The meat and vegetables are dipped in a ponzu sauce and/or a sesame seed sauce before eating (recipes to follow).  Once the meat and veggies have been eaten, the leftover broth from the pot is combined with any leftover noodles and the last of the broth is eaten and it is beyond description how wonderful the broth is after having been flavored even more by the meat and vegetables.  

I think most any foodie would love this one pot meal, although a little labor intensive, it's worth all of the work.  Happy Cooking my friends!

For the Broth:
12 cups beef broth
4 cups water
1 onion, quartered
3 carrots, roughly chopped
3 celery ribs, roughly chopped
5 cloves of garlic, smashed
2" of ginger, skinned and sliced thin
12 whole peppercorns
8 whole cloves
any bones or fat leftover from the sliced rib-eye
3 beef bouillon cubes

For the Beef Broth:
In a large saucepan set over high heat, combine the broth and all of the broth ingredients except the bouillon cubes.  Bring to a boil, turn the heat down to medium-low to let it simmer for at least 30 minutes.  Remove the saucepan from the heat and strain the broth through a fine-mesh sieve, discarding the solids.  Return the pan set over medium-high heat and bring to a boil.  Skim the fat off the top of the broth.  Add bouillon cubes.  Turn heat to low.

For the Meat:
Vegetable and Noodle Plates:
1 head of Napa cabbage with stalk and ribs removed and leaves separated
1/2 cups enoki mushrooms, trimmed
1 - 1/2 cup shitake mushrooms, stemmed
1 small vidallia onion or yellow onion, sliced thin and cut in half
2 bunches green onion, sliced in 1" slices cut on the diagonal
2 carrots, sliced thin
4 cloves of garlic sliced thin
1 jalapeno, sliced thin and seeds removed
1 - 14 oz package firm tofu, cut into bite-sized squares
3 - 8 oz udon noodles, prepared as directed on the package

Arrange the meat on a large platter, the vegetables and tofu on a second large platter and the cooked udon noodles in a large bowl.

Set a portable stove in the middle of the dining table and place a Dutch oven over the burner.  Pour some of the strained broth into the Dutch oven and bring to a very slow simmer (don't let it boil).

As the broth warms, bring the meat, vegetables and noodles to the table along with 6 soup bowls.  When the broth reaches a light simmer, let your diners add some broth to their soup bowls and then begin cooking: working in batches, add the vegetables and cook until tender, a few minutes.  Add 1 slice of meat with chopsticks and cook for a few seconds, until just cooked.  Dip the cooked meat and vegetables in a Ponzu sauce and a sesame dipping sauce (recipes to follow).  Repeat with remaining meat and vegetables.

When everything has been cooked up, add the udon noodles to the broth and stir until warmed through.  Divide the noodles and remaining broth between the 6 soup bowls.

Ponzu Sauce:
1/4 cup lime juice
1 TBSP rice vinegar
1/3 cup beef broth
1/3 cup soy sauce
1/2 tsp hot chili sauce
2 TBSP Worcestershire sauce
pepper to taste
4 cloves of garlic, minced
1" ginger thinly grated

Mix all ingredients well.

Miso-Tahini Sauce and Chile Oil:
1/4 cup water
3 TBSP mirin
3 TBSP tahini
3 TBSP soy sauce
1 - 1/2 tsp red miso
1 - 1/2 TBSP sugar
1 TBSP sake, optional
1 tsp sesame oil
roasted sesame seeds for topping

Mix all ingredients well.  Top with sesame seeds for a garnish. 

*Serve with Sriracha to spice up to your liking.

This recipe is adapted from TastingTable.com.

Wednesday, February 26, 2014

Stir-Fried Shrimp With Udon Noodles


Happy New Year to all of my fellow foodies!  I've taken another break from blogging after a very action-packed couple of months with family and friends...We are beyond blessed.  I'm ready to get adventurous again when it comes to food and I'm more than ready to share all of my newest finds.  I've got so many great recipes teed up, so lets get cooking.

It seems there's a bit of a noodle craze going on.  With the likes of ramen, Soba, Udon and rice noodles showing up in the hippest of restaurants.  Although we've been cooking with rice noodles in our signature dish, Pho for many years, I've been particularly intrigued with Udon noodles lately, mostly because they're a healthy alternative to regular pasta, as are they all. 

The definition of Udon is it's a type of thick wheat flour noodle of Japanese cuisine. Udon is often served hot in a noodle soup in its simplest form, as kake Udon, in a mildly flavoured broth called kakejiru, which is made of dashi, soy sauce, and mirin.  I'm going to have to google that recipe and try it out.


The original recipe I found for this Udon variation, in addition to the shrimp, it called for 1/4 lb skinless, boneless chicken breast, thinly sliced and sauteed in oil.  I left the chicken out and increased the amount of shrimp.  It also called for 2 1/2 cups of chopped Napa cabbage, which I also opted not to add and added snap peas instead.  You can add any combination of veggies that you like...or leave out the chicken and shrimp all together and make it a vegetarian dish.  The possibilities are endless.

My family loved this dish, not only because of all the wonderful flavors going on, but especially because we're all trying to eat healthier.  We'll be making this dish again soon, but will change it up a bit, maybe by adding some oyster and fish sauce to the mix.  And of course, top with Sriracha hot chili sauce to make it as spicy as you like.  Happy Cooking my friends!


2 TBSP vegetable oil
1 lb large shrimp, shelled and de-veined
1 cup or so of snap peas
1 small onion thinly sliced
4 cloves of garlic, chopped
2 tsp grated ginger
1 - 2 carrots thinly sliced
7 oz enoki mushrooms
4 oz oyster mushrooms
1/4 cup dried wood ear mushrooms, soaked in warm water for 10 minutes and drained
1/2 cup chicken stock
3 TBSP soy sauce
1 tsp Asian sesame oil
zest and juice of 1 lime
18 oz Udon noodles
1/4 cup toasted sesame seeds or chopped roasted peanuts
Kosher salt and freshly ground pepper
chopped scallions, for garnish 
chopped cilantro leaves, for garnish

In a skillet, heat 1 TBSP of the vegetable oil.  Add the shrimp and stir-fry over moderately high heat until curled, 2 minutes; transfer to a plate. 

Add the remaining 1 TBSP of oil to the skillet.  Add the snap peas, onion, garlic, ginger, carrot and the mushrooms and stir-fry for 4 minutes.  Add the stock, soy sauce, sesame oil, lime juice and zest and shrimp; remove from heat.

Meanwhile, cook the Udon according to package directions.  Drain and add to the skillet.
Stir-fry over medium high heat until heated through.  Season with salt and pepper, garnish with scallions and cilantro and serve.


This recipe is adapted from a recipe I saw on Food and Wine Magazine's website.

Sunday, October 27, 2013

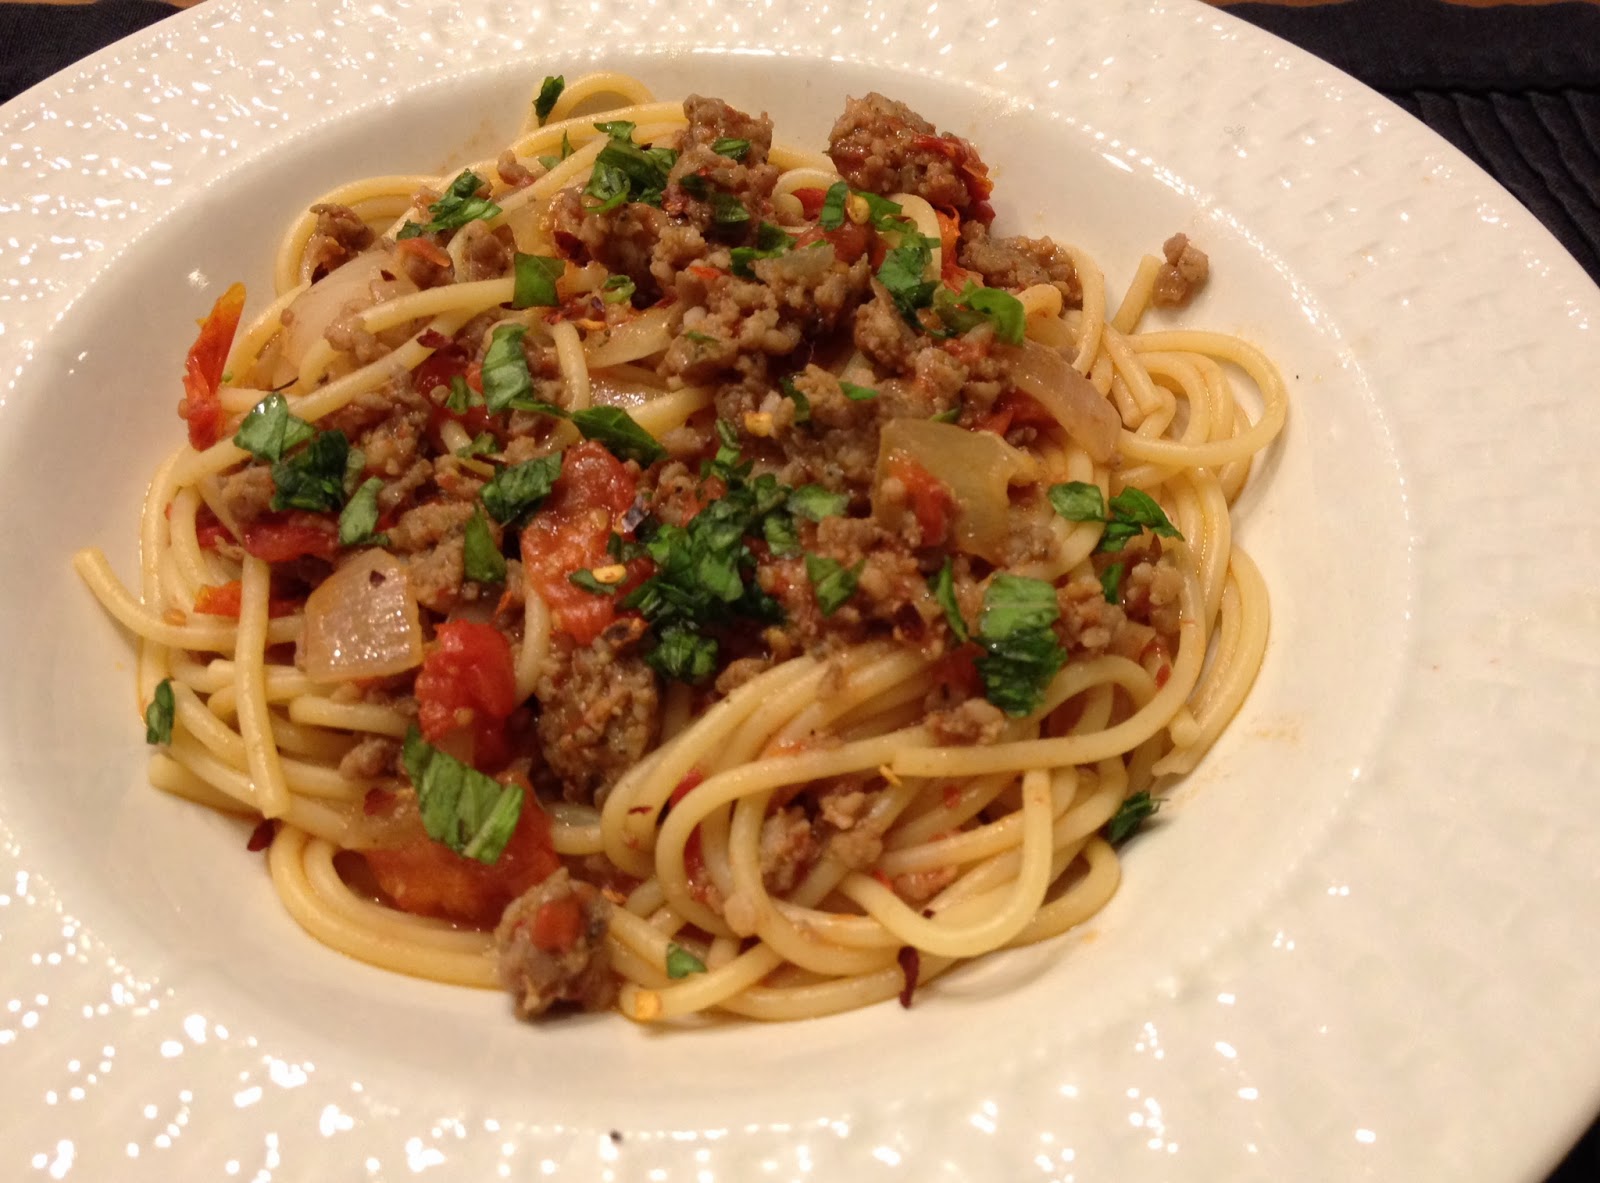
Pasta with Roasted-Tomato Meat Sauce


Unlike most in my family, I'm a big fan of spaghetti and when I saw this recipe that included anchovies in the sauce I was all over this dish and couldn't wait to make it.  One of our favorite side dishes is my Mother-In-Law's Caesar salad, which most Caesar dressings include anchovies.  Sara's salad would be a fabulous accompaniment to this recipe along with some good, crusty bread.  Over the years everyone in our family has acquired a taste for and gained a great appreciation of anchovies...they're salty additions of true goodness.  The anchovies don't lend a fishy taste like most people think, but rather are an element to season the sauce in addition to using salt.  This recipe was a very easy, authentic Italian dish to prepare and will be a dish I will make again soon. 


1 pint cherry tomatoes 
8 oz uncooked spaghetti 
2 tsp unsalted butter 
9 oz 80% lean ground pork (I used Jimmy Dean's Hot Pork Sausage)
1 TBSP minced garlic
1 cup yellow onion, chopped
1/2 tsp kosher salt (I didn't add because I used salted butter)
1/2 tsp crushed red pepper (I didn't use as much because the sausage I used was spicy)
3 canned anchovy fillets in oil, drained and chopped
1/4 cup dry sherry
1 1/2 TBSP balsamic vinegar
1/4 cup fresh basil leaves
grated parmesan cheese

Preheat oven to 400°.

Place cherry tomatoes on a jelly-roll pan. Bake at 400° for 20 minutes or until tomatoes are lightly browned.  Crush the roasted tomatoes well.

Cook pasta according to package directions, omitting salt and fat.

Melt the butter in a large skillet over medium-high heat. Add pork, garlic, onion, salt, pepper, and anchovies to pan; cook 4 minutes or until pork is browned, stirring to crumble. Add sherry to pan; cook 30 seconds, scraping pan to loosen browned bits. Add crushed tomatoes and vinegar; cook 2 minutes or until tomatoes release their liquid and sauce is slightly thickened. Combine pasta and sauce in a large bowl; toss to coat. Sprinkle with basil and parmesan cheese.

This recipe was adapted from Adam Hickman, Cooking Light 
OCTOBER 2013

Saturday, July 6, 2013

Grilled-Beef Summer Rolls


I hope everyone had a very Happy and safe 4th of July!  Steak is something many folks prepare for the 4th.  This recipe is a great use of leftover steak and makes for a fresh, healthy appetizer and/or snack.  You could substitute cooked, shrimp, pork or make it with no meat at all and go strictly vegetarian by adding any of your favorite veggies.  Serve with the sauce included in this recipe or serve with the peanut sauce that follows.  Happy Cooking!

1 1/2 oz rice stick
Twelve 8-inch round rice paper wrappers
1/4 cup chopped basil leaves
1/4 cup cilantro leaves
1/4 cup mint leaves
1 large carrot, finely shredded
2 Persian cucumbers, cut into long matchsticks
2 - 3 green onions, sliced thin
2 tsp rice vinegar
6 oz very thinly sliced leftover grilled rib eye, steak or deli roast beef
4 TBSP fresh lime juice
4 TBSP Asian fish sauce
2 TBSP sugar
2 tsp minced garlic
2 tsp Sriracha
pepper to taste

Boil the rice stick in boiling water for no more than 4 minutes.


Marinade cucumber, carrots, garlic and green onions in rice vinegar for a brief bit.

Fill a medium bowl with hot water. Soak 1 rice paper wrapper at a time in the water for 30 seconds, until just pliable. Transfer to a work surface.  Top each wrapper with some noodles, herbs, carrot, cucumber and beef. Tightly roll up the wrappers around the filling, tucking in the sides as you roll. Repeat with the remaining fillings.

In another bowl, stir together the lime juice, fish sauce, sugar, garlic, Sriracha and 2 tablespoons of water. Serve the rolls with the dipping sauce. 


*The above recipe is adapted from Food and Wine Magazine.


Peanut Sauce:

4 tsp fish sauce
1/4 cup water
2 TBSP fresh lime juice
1 clove garlic, minced
2 TBSP white sugar
1/2 tsp garlic chili sauce
2 TBSP peanut butter
4 TBSP hot tap water
3 TBSP light soy sauce
2 green onions, chopped for garnish
1 - 2 TBSP dry roasted peanuts, chopped

In a small bowl, mix the fish sauce, water, lime juice, garlic, sugar and chili sauce. In a 2 cup measuring glass add the peanut butter, then add the hot water. Stir with a fork until it is the consistency of whipping cream. Add the soy sauce, mix well. Garnish with chopped peanuts and green onion. 


Monday, July 1, 2013

Salad Caprese


Happy July everyone!  Hard to believe we're already halfway through 2013.  So many fabulous recipes and so little time!  :)

We've been growing our own vegetables, and one of our newest, favorite salads has been with fresh mozzarella, our own homegrown, sliced tomato and fresh basil topped with either a balsamic or red wine vinaigrette.  For a healther version skip the oil altogether and dress the salad with your favorite vinegar only and use a lite mozzarella.  For a snack, I use cherry tomatoes and sliced, lite mozzarella string cheese for a mini-sized, healthy portion.  I dress my salad with my favorite, balsamic vinegar only and it's the perfect complement to this dish.

3 vine-ripe tomatoes, 1/4-inch thick slices
1 pound fresh mozzarella, 1/8-inch thick slices 
20 to 30 leaves (about 1 bunch) fresh basil
Vinaigrette (recipe to follow)*
salt and pepper to taste

Slice the tomatoes and mozzarella and arrange with the basil leaves on a large platter. Drizzle with vinaigrette. Sprinkle with salt and pepper and serve at room temperature.

Vinaigrette*

1/4 cup balsamic or red wine vinegar
2 tsp dark brown sugar, optional*
1 TBSP chopped garlic
1/2 tsp salt
1/2 tsp freshly ground black pepper
3/4 cup olive oil (I only use about 1/2 cup or even less because I like my dressing more vinegary)

Beat the vinegar in a bowl with the optional sugar, garlic, salt and pepper until sugar and salt dissolves. Then beat in the oil by droplets, whisking constantly. (Or place all the ingredients in a screw-top jar and shake to combine.) Taste and adjust the seasonings.

*The vinaigrette recipe is Emeril Lagasse's


Saturday, June 29, 2013

Bonnie's Slow Cooker Mexican Chicken


Our very dear friend, Bonnie generously passed along to me one of her classic recipes that she knew our family would love.  Bonnie knows and truly appreciates what a foodie I am and how I'm always on a quest for a new dish to try...especially a Mexican dish.  :)  Many thanks to our sweet and beautiful friend, Sista B...I post this recipe in your honor.  We love and miss you lots!  xoxo

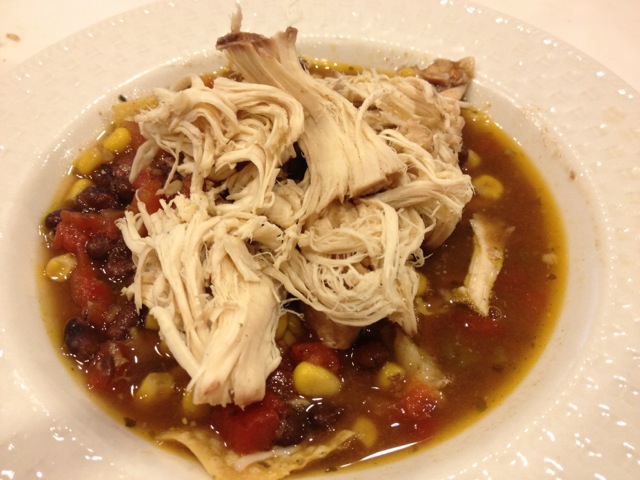
I so enjoy preparing dinner in my Crock Pot, so as to make the house smell wonderful, with tasty temptations, teasing most all of our senses all day long, until the final reward when dinner is served.  So for this dish in particular, and being on a bit of a health kick, I've combined multiple recipes to come up with the healthiest, tastiest version I could.  This is yet another versatile dish that you can serve over rice, in tortillas or crispy taco shells, serve with chips as a nacho dish, eat it like chili or tortilla soup.  You can make it richer by adding a cut up cube of cream cheese at the end of the cooking process, which is how Bonnie's recipe directs (see below)*.  Or skip the cream cheese and make it lighter, it's still very tasty that way.  On our first attempt at this recipe we made a tortilla soup by adding more broth and topping our soup with avocado, cheese, baked tortilla chips and lime slices.  It was absolutely fabulous.  No matter how you decide to prepare this meal, it's definitely one to add to the repertoire.  Happy cooking! 

4 chicken breast bone-in (I left one breast with the skin on to help add flavor to the broth, also, most of the recipes I saw called for boneless, skinless breasts...I prefer bones in because that also helps add to the flavor)
2 cans seasoned black beans, not drained
2 cans of corn, drained and rinsed
Chicken broth, (the amount depends upon how you will be serving, more for a soup, less for tacos or nachos)
1 package taco seasoning...I prefer McCormick's because I'm partial to the name ;)
1 tsp dried cilantro
1 tsp garlic powder
pepper to taste
1 cup salsa, I used mild "Hell on the Red, " (but why not kick it up a bit with a hotter salsa if you like it extra spicy)
1 can hot Ro-tel tomatoes or use original to make it less spicy
Mexican cheese for topping
Avocado, sliced for topping
Fresh cilantro leaves
Lime wedges

Put beans, corn, taco seasoning, and broth in crock pot and mix together until seasoning is dissolved. Place chicken breasts on top and spread salsa on chicken. Cook on low for 8 hours or on high for 4 hours. 

Shred meat and serve however you want (see explanation above). Garnish with cheese, sour cream, avocado, lettuce, tomato, and hot sauce.

*For a richer version and the way our friend Bonnie prepares it, is to add a small, cut-up bar of cream cheese on top towards the end of the cooking time.  Let melt and once melted stir through and serve with tortilla chips.

**Also, this is such an easy freezer meal to save with any leftovers.  Prepare it with 5 chicken breasts and eat half for dinner and freeze the other half in a gallon-sized freezer Ziploc bag for another meal.  Make sure you let the food cool before freezing it. On the day that you're ready to eat it, let it thaw and then cook on low in your Crock Pot for 2 - 3 hours.

Monday, June 17, 2013

Thai Chicken and Shrimp Noodle Salad


\

Hello again my fellow foodies and Happy Summer to you all!  I've taken yet another break from blogging, as somehow life gets in the way. ;)   I return to you with healthier recipes that I promise won't disappoint.  With our home full again, the girls are briefly back from college and jobs and we've all vowed to eat healthier, exercise more and it's just worked out that we're spending a lot more time with our family unit this summer. :) Needless to say, David and I are loving every every minute...chaos and all.  In addition to our kids all home we have two dogs (lab pups no less), a cat and whatever animal Cassidy has adopted, whether it be a baby squirrel or alley cat...and of course we can't forget our beloved snake, Bond James-Bond, a snake we adopted 4 years ago for Dylan...Who would've ever thought I would have a snake in my house?!  We're definitely glutton's for punishment, but would have it no other way.  With all of our time together we're hanging out in the pool, watching lots of movies and of course, are cooking away, with Avery and Cassidy helping mostly, Dylan's the in-house comedian with his Dad's sense of humor.  There have been a few epic jam sessions with great friends and family...I love, absolutely LOVE having our house full of family, friends, music, painting Altoid tins ;) (don't ask), cooking our favorite foods and whatever creative energy might be happening at any moment.  I do adore summertime!

In the spirit of eating healthier here's a fabulous dish that was a hit with the family.  It's a recipe I tweaked from the one I saw on Epicurious.com.  I quadrupled the amount of dressing that their recipe originally called for, because I like having extra for a dipping sauce, especially if making spring rolls, which would be the perfect side dish or appetizer.  This dish is a lot like Pad Thai minus the egg and could work out beautifully as a vegetarian dish, adding most any vegetables you prefer.  Another option is to use just chicken or just shrimp...I especially appreciate a dish that is so versatile.  I will be back soon with another healthy recipe.  Happy, healthy cooking everyone!  <3


Salad Dressing:

1/2 cup fresh lime juice
1/2 cup fish sauce* (such as nam pla or nuoc nam)
1/2 cup Asian sweet chili sauce*
4 TBSP vegetable oil
2 TBSP sugar
1/4 cup garlic, chopped
pepper to taste

Salad Additions:

9 oz Rice Stick*
12 cherry tomatoes, halved
32 oz bag of raw, medium-sized shrimp, peeled and deveined, cooked and marinated as  
   directed below**
1 - 1/2 cups cooked chicken (a rotisserie chicken from the grocery store works well)
1 cup green onion sliced thin, divided use for salad and for garnish

Garnish Plate:

1 - 1/2 cups bean sprouts, rinsed

1/2 English hothouse cucumber, very thinly sliced and peeled (about 1 cup)
1/2 cup fresh mint leaves
1/2 cup fresh basil leaves
1/2 cup fresh cilantro leaves
1/3 cup thinly sliced shallots or red onion
2 red (or green) jalapeno pepper with or without seeds, depending upon how spicy you   
    like it, sliced into thin rings

1/4 cup chopped dry-roasted peanuts, chopped
2 limes cut into wedges


*Available in the Asian foods section in most supermarkets and at any Asian market.

**I marinated the shrimp in 1/4 cup soy sauce with a splash of white wine, a little garlic  
powder, ground ginger for at least 30 minutes.  I sauteed the shrimp in a wok with a little vegetable oil and just a splash of sesame oil until they turned pink.  Or make it easy on yourself, although not quite as tasty, and buy already cooked shrimp.


Two hours prior to cooking time, whisk the first 7 ingredients for the dressing in a large bowl to blend. Let stand at room temperature.

Put together a garnish plate consisting of bean sprouts, cucumber, mint, basil, cilantro, shallots, jalapenos and lime wedges.  Keep refrigerated until ready to serve.

Boil rice stick in boiling for 4 minutes.  Promptly drain and rinse under cold water to cool; drain well. Transfer to bowl with 3/4 of the dressing, saving the rest for a dipping sauce, if you so desire.

Add tomatoes, shrimp, chicken and green onion except peanuts and the rest of the green onion, to noodles; toss to coat.

Divide among 6 plates. Sprinkle with peanuts and green onion.  Serve with the garnish plate, Sriracha and additional dressing so your guests can doctor up their plates to their individual liking.  

This recipe is adapted from Epicurious.

Sunday, June 16, 2013

Father's Day


In honor of Father's Day I'm posting some of my Dad's writings again. This is mostly for my kid's and my benefit more than anything.  My Dad was the most inspirational, positive and kindest soul I ever knew.

Shortly after being diagnosed with bone cancer Dad wrote "Notes to My Grandchildren." The title says it all. It's a heart-warming essay full of inspirational advice that he knew he wouldn't be around to give to most of his grandchildren in person. He truly was like no other.


Thank you to my dear friend, LuAnn for typing NTMG so I could post it on-line for everyone to enjoy. You're the bestest friend ever...I love you so much!

The last week of Dad's life, he was in charge of the huge undertaking of "Dallas Acts Kind Week."  My sweet Mom was with David, our daughter, Avery (17 months) and me in West Palm Beach, eagerly awaiting Cassidy's arrival as she was several days beyond her due date.  My Dad strongly encouraged my Mom to go be with us for the arrival of our newest blessing, our Cassidy.  Of course, my Mom had no idea the end was so near or she would've never gone to Florida.  Although, now looking back, I think my Dad knew exactly what he was doing by sending my Mom away.  Cassidy was just 4 days old when we received the call that my father passed away. I believe he sensed his passing was near and wanted to spare my Mom as much trauma as possible.  He wanted her to relish in the beauty of a new life beginning.  Not his ending, as his body has threatened to do so so many times before and she was always there right by his side.  God Bless my beautiful Mother...She and Dad have been through more than anyone should ever have to, but both of them will forever be my heroes.  My sister, Patti was left to help my Dad at home and she and my brother, Mike were with him until the very end....God Bless them all!  My Dad was determined to get through "Dallas Acts Kind Week," which he did and with so much grace and dignity.  

Several weeks after my Father's passing someone pointed out to us the meaning of the Grateful Dead's song Cassidy.  Right about the time Avery was born David became a major Deadhead.  We didn't know the lyrics to the song, "Cassidy" but we loved the name and decided we would name our beautiful daughter after the song, with no idea it was so poignant to our situation.  It's about how one life ends and another one begins.  If you care to read the words, it truly is ironic.  She was definitely born to be Cassidy!  <3


Dad, you are missed each and every day, much more than words could ever convey! I'm so proud to be your daughter!

I love you!
Special K