Pho - Vietnamese Soup

Pho - Vietnamese Soup
One of our favorite dishes - Pho

Wednesday, December 30, 2020

Vietnamese-Style Noodle Bowls with Roasted Chicken


This is a dish I could eat everyday because it's light, yet very satisfying and fresh.  You could substitute the chicken with cooked shrimp or thinly sliced, pan seared steak.  Or, you could get just use only vegetables, adding most any you prefer.  I didn't have rice vinegar, so I used red wine vinegar instead, which worked out wonderfully.  I also doubled the dressing because this didn't make enough for my liking.  This is a very vinegary and sweet dressing, which we enjoyed, but if you're not a fan of your dressing being too vinegary you could add some olive oil to tone it down.  I added julienned celery and will add fresh basil and cucumber next time I prepare this light and tasty meal-in-one.  Great for a light lunch or dinner.  Of course you have to serve it with Sriracha as the perfect condiment for any dish.


2 tablespoons granulated sugar, or more to taste

1/2 cup seasoned rice vinegar

1 tablespoons fish sauce

1 piece (1-inch) fresh ginger, cut into 2 thick slices

1 clove garlic, halved

2 cloves garlic, finely chopped

2 tablespoons hoisin sauce

2 tablespoons oyster sauce

2 tablespoons canola oil

2 large skinless, boneless chicken breasts

8 ounces rice noodles

2 carrots, grated

2 cups fresh bean sprouts

1 jalapeno or other chili pepper, cored and thinly sliced

2 scallions, thinly sliced

3 tablespoons chopped fresh cilantro leaves

3 tablespoons chopped fresh mint leaves

1/4 cup peanuts, coarsely chopped

1 lime, quartered, for garnish
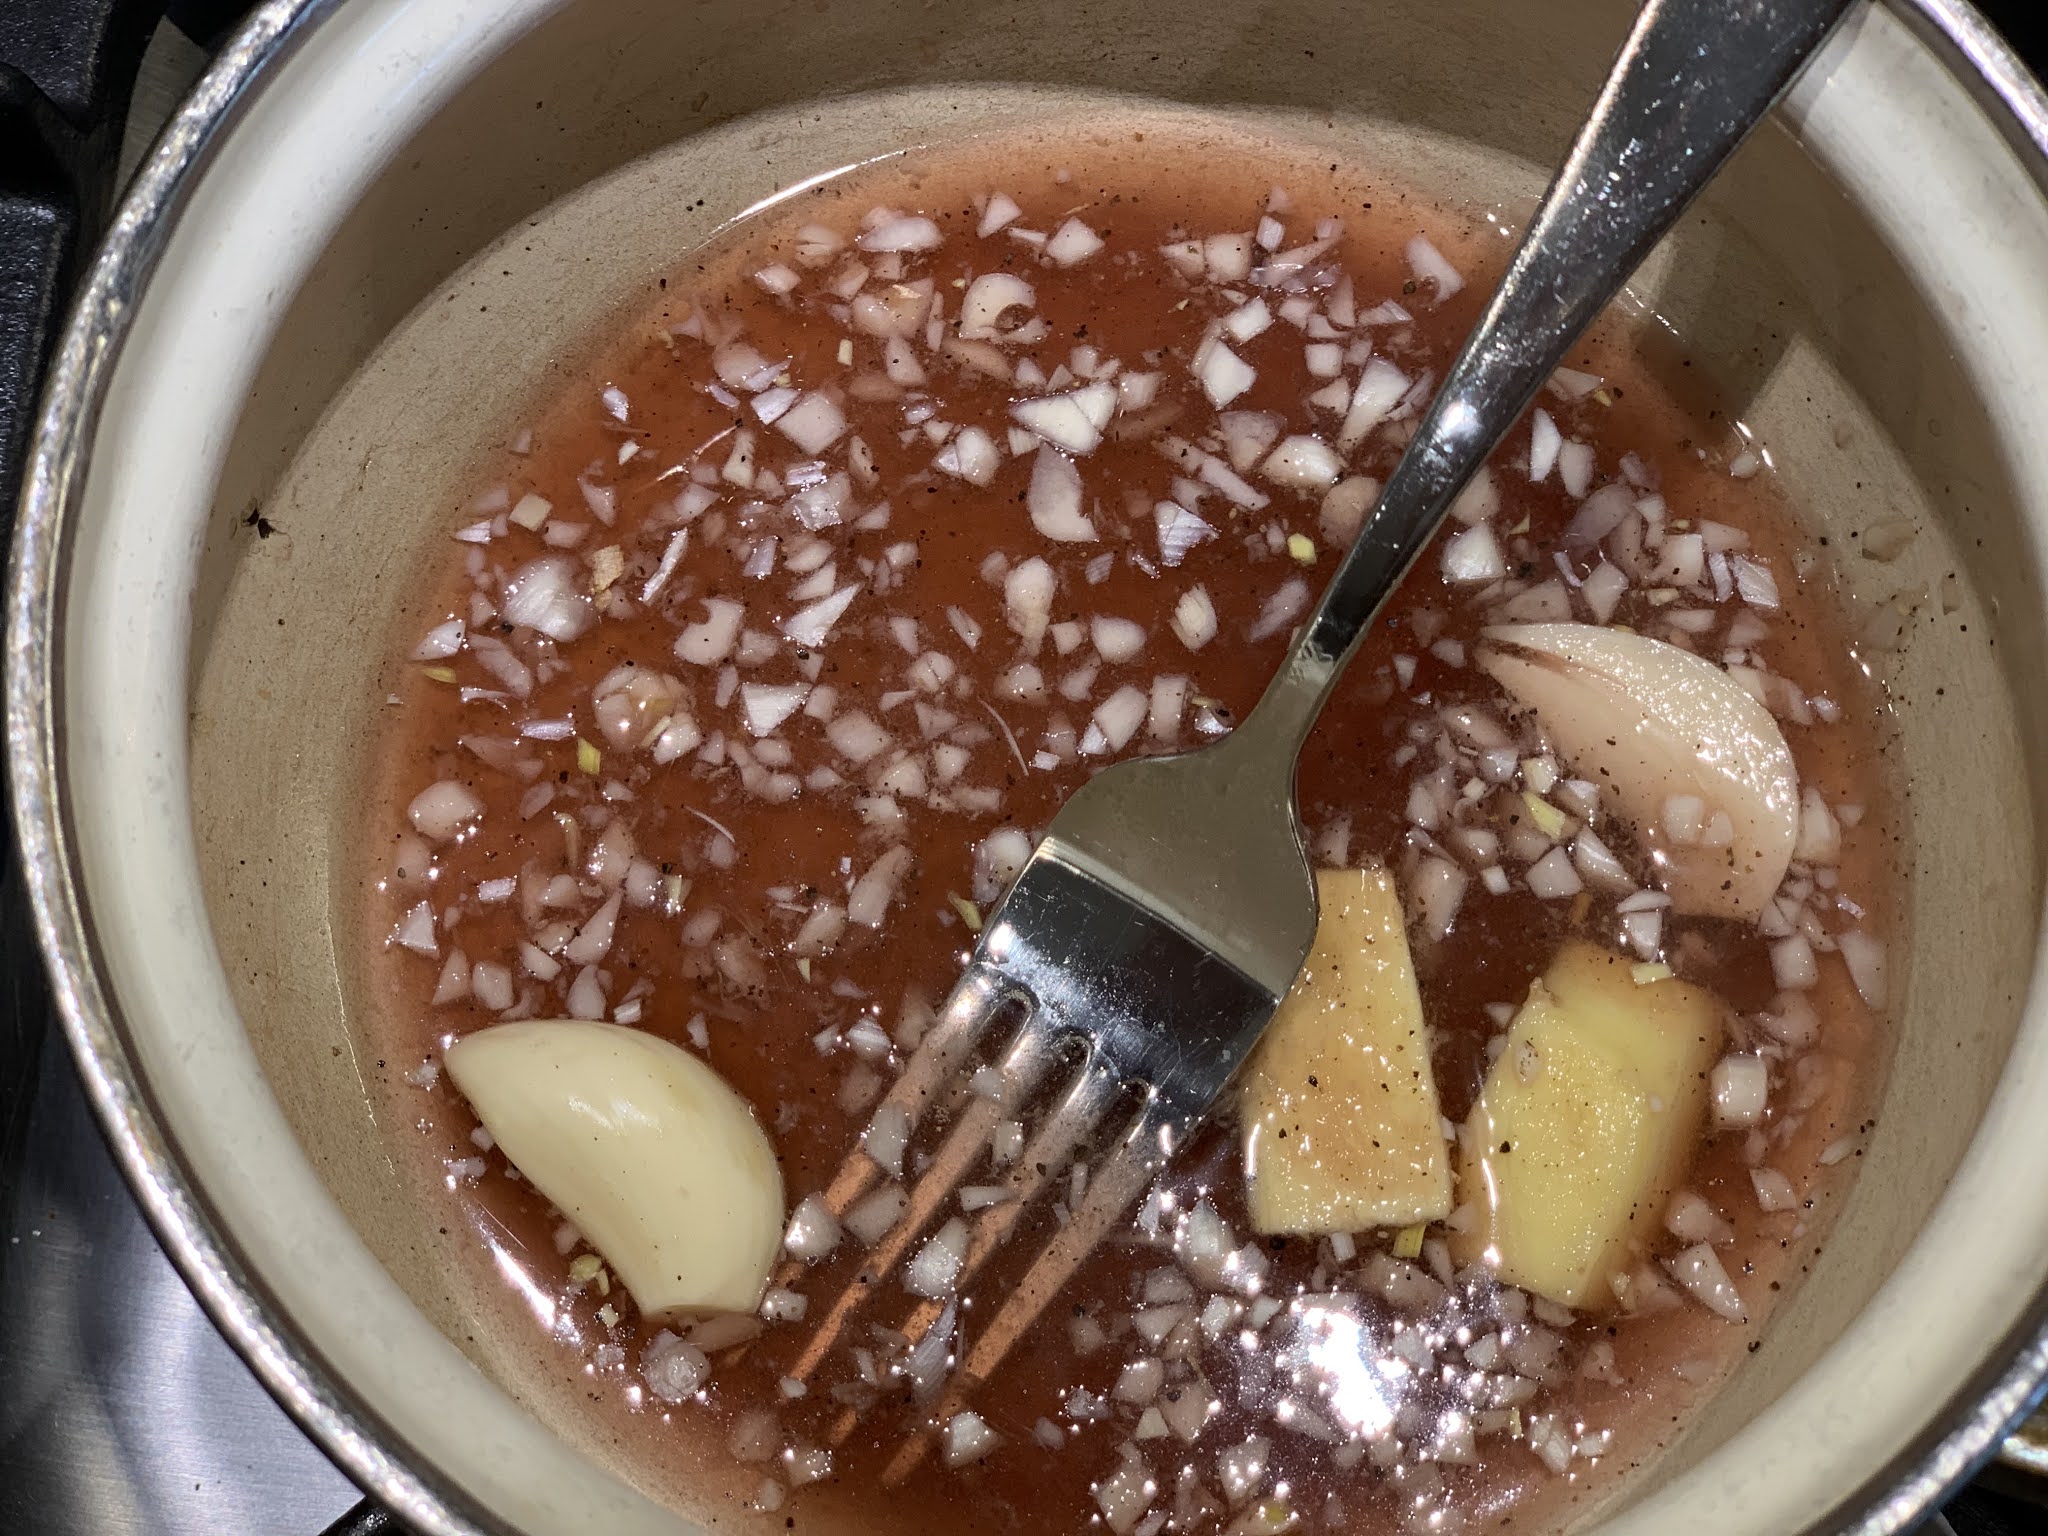

Make the dressing

In a saucepan over medium heat, combine the sugar, rice vinegar, fish sauce, ginger, and garlic halves and the diced. Cook, stirring often, just until bubbles appear at the edges and the sugar has dissolved. (Alternatively, microwave in 30-second bursts until the sugar has dissolved and the dressing is hot.)

Remove from heat and cool to room temperature. With a slotted spoon, remove and discard the ginger and garlic.

Taste the dressing for seasoning and add more sugar, 1/2 teaspoon at a time, if you like. The dressing should be a nice balance of vinegary and sweet.

This can be prepared several days in advance; keep refrigerated.

Bake the chicken: 

Warm the oven to 400F. In a bowl, combine the hoisin and oyster sauces with the canola oil. Add the chicken and turn well to coat all over.

Arrange the chicken in an 8x8 baking dish in one layer. Cover with foil and cook for 35 minutes, or until a meat thermometer inserted into the middle of the breasts registers 165F.


While the chicken bakes, cook the noodles: Bring a large saucepan of water to a boil. Remove from heat, add the noodles, and let stand for 3 to 5 minutes, or until the noodles are tender when you taste one.

Drain into a colander, rinse with cold water, and shake the colander to remove excess water. (If the chicken isn't quite ready yet, cover the noodles with cool water to keep them from drying out. Drain before serving.)


Sear the chicken: 

Heat a large nonstick or well-seasoned cast iron skillet over medium-high heat. Arrange the cooked chicken breasts in one layer and cook 2 minutes. Turn and cook 2 minutes more. Watch carefully so they do not burn.

Remove from the pan, and allow to cool briefly. Slice the chicken thinly, keeping the slices together if possible.


Assemble the salad: 

Divide the noodles among 4 large bowls. Top with sliced chicken, carrots, bean sprouts, jalapeno, and scallions. Sprinkle with a few spoonfuls of dressing, then garnish with cilantro, mint, and peanuts. Serve with lime and remaining dressing on the side.


**This recipe adapted from  Sheryl Julian with Simply Recipes


Sunday, December 20, 2020

Roasted Brussel Sprout Leaves


As a side dish this is a family favorite and as far as we're all concerned, is the only way to prepare and eat Brussel sprouts.  Brussel sprouts can be a little bitter and I wasn't really a fan until I had them prepared this way...oven roasted, with only the leaves.  These sprouts turn out to be crispy, light, pieces of heavenly goodness.


Brussel sprouts

olive oil

salt and pepper to taste


Preheat oven to 400 degrees.

Cut ends off brussels sprouts and remove leaves. Discard the ends.

On a non-stick cookie sheet spread out the leaves evenly.

Lightly drizzle olive oil all over the leaves.  Sprinkle with salt and pepper.

Place in oven and roast for about 20 minutes, tossing every five minutes.  Keeping a close eye because a lot can happen in 5 minutes.  

They're done when they turn golden and crispy.  Some might even look the slightest bit burnt, but that just means they will be crispy little bits of goodness.  

Saturday, December 19, 2020

Classic Oven Baked Red Snapper Mojo de Ajo


This recipe rivals one of our favorite Dallas restaurant's "Javier's" classic dish.  You could use any nice filet of fish, but we prefer red snapper because of it's light, delicate flavor.  Use all butter or all olive oil for a completely different sauce, either way it will turn out delicioso!!  :)

1 lb red snapper filet or any other kind of fish filet
juice of 1 lemon, plus zest
3 tablespoon butter, melted
1 tablespoons olive oil
4 - 6 cloves of crushed garlic
Salt and pepper to taste
lemon sliced thin
fresh parsley, chopped for garnish

Preheat oven to 350 degrees. 

Wash the fillets and pat them dry.

Arrange the fillets in a baking tray.

Mix lemon juice, zest, butter, olive oil, garlic, salt and black pepper in a bowl.

Pour this mixture over the filets.

Arrange lemon slices in on top of the filets.

Bake the fish for 15 - 20 minutes, depending upon thickness....sometimes we cook a thick filet for 45 minutes.

Garnish with fresh parsley.


Thursday, December 17, 2020

Slow Roasted Crispy Skin Pork Shoulder


One of my latest home cooked food obsessions has been this pork roast recipe.  It's super easy to prepare and it's totally a no-fuss kind-of-deal...which who doesn't love that?!  For me, this is perfect to cook on a lazy, rainy Sunday.  I most often serve this as pulled pork with slider buns and Stubbs barbecue sauce for sandwiches, along with Vincent's garlicky cole slaw recipe.  I've prepared this roast before doing our tailgating thing and it has continued to be a hit. 


An 8 pound roast will serve around 20 people. AND the best part is, it only costs around $16.  

8 lbs bone-in, skin-on, pork shoulder
3 1/2 tablespoons-ish salt (or I use Tony Cachere's instead of salt) I got light
1 tablespoon garlic powder, or to taste
2 tsp oregano, finely ground
1 tablespoon black pepper, or to taste
2 tsp onion powder


Rinse and pat dry the pork. Leave on the counter-top for 2-3 hours to come to room temperature.

Once the pork has been dried and is coming to room temperature (after a few hours), preheat your oven to 250F. Mix together all of the spices in a bowl.

Starting skin side down, pat the salt rub all over the pork to completely cover it. Once the bottom is done, flip and place on a wire rack that’s sitting over a baking sheet covered in foil. Spread the rub on all sides and top of the pork.

Once your oven is preheated and pork rubbed, place into the oven and roast for anywhere between 8-10 hours. I did 10 hours for my 8 lb. roast, but if you have smaller sizes or bigger sizes, you will have to adjust accordingly. You essentially want the internal temperature to be about 190F.

Remove the pork from the oven and cover with foil. Allow the pork to rest for 15 total minutes. 

Optional: 
I don't usually do this final step as I find the pork to be usually perfectly roasted at this point

Preheat oven to 500F.

Once pork is rested and oven to at 500F, remove the foil tent from the pork and place into the oven. We will rotate the pork every 5 minutes to allow for even cooking of the skin. There may be smoke that comes out of your oven during this process due to the fat that dripped off during the roast time burning. You can either open the window or remove this fat previous to putting into the oven.

Take the pork out of the oven and let rest for 15-20 minutes before slicing/shredding.

The pork should be completely tender, easily separating from the roast simply by pulling the meat off with a couple of forks.


*Recipe adapted from ruled.me

Monday, December 14, 2020

The Best Baked Potatoes


Really and truly, these are by far the best baked potatoes.  Also known as English Jacket Potatoes.  Takes about 2 hours, but well worth the wait.  Not much work required to achieve the fluffiest potato with crispy skins that are just like a freshly fried potato chip.  You'll never want to have your baked potatoes prepared any other way.


Russet potatoes scrubbed and dried thoroughly (or you can use a large Yukon)

olive oil

kosher salt

freshly ground pepper


Preheat over to 400 degrees.

Slice a criss cross shape about 1/4 inch thick into each potato.  This helps them release some steam, makes the interior fluffy and also makes them easier to slice into when they're piping hot.

Rub each potato lightly with olive oil, kosher salt and freshly ground pepper.

Bake them for close to 2 hours.  The long bake means the skin will be so crisp that it’s practically cracker-like.

After the two hours are up, remove the potatoes and carefully cut deeper into the slices you made initially. Then put the potatoes back in the oven for an additional 10 more minutes. This helps to dry out the flesh further and makes it extra fluffy.

When you take those piping hot potatoes out of the oven, push open that crispy, crackly skin, drop a little pad of butter, and sprinkle plenty of salt and freshly ground black pepper into the lightest, fluffiest baked potato you’ll ever make.


**Recipe adapted from The Kitchen


Saturday, December 12, 2020

Individual Peach Ginger Cobblers


I absolutely cannot resist a piping hot cobbler topped with a scoop of homemade vanilla bean ice cream melting all over...adding the perfect compliment to this sweet indulgence.  AND who doesn't love a little miniature cast-iron skillet to have your dessert presented to you in?!  You can use cocottes or mini anything to cook them in or if you don't have mini skillets, you can bake one large cobbler in a 10-inch cast-iron skillet.  If you don't have peaches you can substitute with apples, blueberries or most any berry.  I'm the type too that might double up on the scrumptious topping because to me, that's the best part.  You can't go wrong with this good ol' southern staple for dessert.  

Makes 6 servings

1/2 cup unsalted butter, softened

1/4 cup granulated sugar

3/4 cup firmly packed light brown sugar, divided

1 cup plus 3 tablespoons all-purpose flour, divided

1/2 teaspoon ground nutmeg

1/4 teaspoon ground ginger

1/4 teaspoon kosher salt

6 to 8 cups fresh peaches, peeled and sliced (about 8 medium peaches)

1 1/2 tablespoons grated fresh ginger

1 tablespoon fresh lemon juice

1 teaspoon vanilla extract

1/2 teaspoon ground cinnamon

1 large egg, lightly beaten

3 tablespoons turbinado sugar


Preheat oven to 375 degrees. Spray 6 (4 1/2 inch) cast-iron skillets with cooking spray.

In a large bowl, beat butter, granulated sugar and 1/4 cup brown sugar with a mixer at medium speed until fluffy, 3 to 4 minutes, stopping to scrape sides of bowl.

In a medium bowl, whisk together 1 cup flour, nutmeg, ground ginger and salt.  Reduce mixer speed to low.  Gradually add flour mixture to butter mixture, beating just until combined.  Shape dough into a disk.  Wrap in plastic wrap and refrigerate for at least 30 minutes.

In a large bowl, stir together peaches, grated ginger, lemon juice, vanilla, cinnamon, remaining 1/2 cup brown sugar and remaining 3 tablespoons flour.  Spoon peach mixture into prepared skillets.  Place on a baking sheet.

Bake for about 15 minutes.

On a lightly floured surface, roll dough to 1/4-inch thickness.  Using a 3-inch round cutter dipped in flour, cut dough into 6 circles.  Top each skillet with a circle.  Brush dough with egg, and sprinkle with turbinado sugar.

Bake until tops are golden brown and filling is bubbly, about 30 minutes more.

Top with homemade vanilla bean ice cream.


**Recipe adapted from "Cast Iron Baking Cookbook" by Brooke Bell

Vanilla Bean Ice Cream


This is a classic recipe for my Cuisinart Ice Cream Machine.  Although it requires a little more work than the simple vanilla ice cream recipe, it's definitely well worth the extra effort and is richer in flavor.  For the true vanilla lover, be sure to use fresh vanilla beans to capture the intense flavor.  For my machine, it is recommended that you place the freezer bowl in the back of your freezer where it is coldest. Be sure to place the freezer bowl on a flat surface in its upright position for even freezing. Generally, freezing time is between 16 and 24 hours. Shake the bowl to determine whether it is completely frozen.  This is a little time consuming, but so worth having this decadent, homemade ice cream on hand.

2  cups whole milk
2  cups heavy cream
1  cup granulated sugar, divided
pinch sea or kosher salt
1 whole vanilla bean, halved and seeds scraped
5 large egg yolks
1½ teaspoons pure vanilla extract

In a medium saucepan set over medium-low heat, whisk together the milk, cream, half of the sugar, salt and the scraped vanilla bean (including the pod). Bring the mixture just to a boil.

While the milk/cream mixture is heating, combine the yolks and remaining sugar in a medium bowl. Using a hand mixer on low speed or whisk, beat until mixture is pale and thick.

Once the milk/cream mixture has come to a slight boil, whisk about ¹∕³ of the hot mixture into the yolk/sugar mixture. Add another ¹∕³ of the mixture, then return the combined mixture to the saucepan. Using a wooden spoon, stir the mixture constantly over low heat until it thickens slightly and coats the back of the spoon. This mixture must NOT boil or the yolks will overcook – the process should only take a few minutes.

Pour the mixture through a fine mesh strainer (discard the vanilla pod) and bring to room temperature. Stir in the vanilla. Cover and refrigerate at least 2 hours, or overnight. Whisk mixture together again before pouring into the ice cream maker.

Pour the mixture into the mixing bowl of the Cuisinart Ice Cream and Gelato Maker fitted with the ice cream paddle. Turn unit on, set Timer and press Start. Let mix until thickened, about 40 minutes. The ice cream will have a soft, creamy texture. If a firmer consistency is desired, transfer to an airtight container and place in freezer for about 2 hours. You can remove from the freezer about 15 minutes before serving for softer ice cream.  I prefer to serve my ice cream right out of the freezer.


**This recipe is adapted from Cuisinart


Simple Vanilla Ice Cream


Here's a quick and easy recipe for the Cuisinart Ice Cream Maker.  This recipe, whether served all by itself or in addition to cookies, cakes, cobblers or brownies, is the perfect compliment to most any dessert.  This ice cream can easily be dressed up by adding your favorite chopped candies (snickers are my favorite), sprinkles or nuts at the end of the churning process.  Just make sure you have the mixing bowl for the machine prepared and frozen for the allotted amount of time beforehand.  For my machine, it is recommended that you place the freezer bowl in the back of your freezer where it is coldest. Be sure to place the freezer bowl on a flat surface in its upright position for even freezing. Generally, freezing time is between 16 and 24 hours. Shake the bowl to determine whether it is completely frozen.

5 cups or 10 Servings:

1 cup whole milk (or I've used half-n-half too)
¾ cup granulated sugar 
pinch of salt 
2 cups heavy cream 
1 tbsp pure vanilla extract

In a medium bowl, use a hand mixer on low speed or whisk to combine the milk, sugar and salt until the sugar is dissolved. Stir in the heavy cream and vanilla. Cover and refrigerate 1 to 2 hours, or overnight. 

Turn on the Cuisinart ice cream maker; pour the mixture into the frozen freezer bowl and let mix until thickened, about 25 - 30 minutes. The ice cream will have a soft, creamy texture. If a firmer consistency is desired, transfer the ice cream to an airtight container and place in freezer for about 2 hours. 

You can remove from freezer about 15 minutes before serving if you want your ice cream soft.  I prefer to serve it right out of the freezer.


14 Servings:

1-1/2 cups whole milk 
1-1/8 cups granulated sugar 
3 cups heavy cream 
1-1/2 tbsp pure vanilla extract

In a medium mixing bowl, use a hand mixer on low speed to combine the milk and granulated sugar until the sugar is dissolved, about 1 to 2 minutes. Stir in the heavy cream and vanilla. 

Turn the machine on; pour the mixture into the frozen freezer bowl, and let mix until thickened, about 30 to 35 minutes. The ice cream will have a soft, creamy texture. If a firmer consistency is desired, transfer the ice cream to an airtight container and place in freezer for about 2 hours. 

You can remove from freezer about 15 minutes before serving if you want your ice cream soft.  I prefer to serve it right out of the freezer.


**Recipe adapted from Cuisinart


Friday, December 11, 2020

Crab and Shrimp ƉtouffĆ©e


After one of our notorious steamed blue crab feasts we usually have a few crabs leftover and I'm always trying to figure out something unique to do with all of the saved goodies.  We had shrimp in the freezer and most every other ingredient needed to make this tasty and satisfying, steaming pot of comfort food.  Another reason this dish really spoke to me, was because the roux is a quick-fix compared to some of our favorite gumbo recipes.  You can substitute or add chicken, sausage or any kind of protein or vegetable that you have on hand.  

Prior to starting this recipe, I added the crab and shrimp shells to the chicken broth (straining before adding to the dish) to add an extra layer of flavor and richness .  I also used some of that flavorful broth to cook the rice in, instead of just plain water.  

This recipe was perfect for a cold, fall night.  Serve with a crusty French baguette and maybe even over mashed potatoes instead of rice and you have a lovely, hearty meal.  I'm always a sucker for soups and stews....I could eat them everyday.  I look forward to making this dish again soon.

4 tablespoons butter

2 tablespoons vegetable oil

1/3 cup all-purpose flour

2/3 cup diced onion

1/3 cup diced celery

1/3 cup diced green bell pepper

3 garlic cloves, minced

1 (14-ounce) can chicken broth

1/3 cup dry white wine

1 tablespoon tomato paste

2 teaspoons Cajun or Creole seasoning (I use Tony Cachere's)

1 tablespoon Worcestershire sauce

2 tablespoons chopped fresh parsley

1/4 cup sliced green onions

1 teaspoon hot sauce

1/4 teaspoon dried thyme

1/4 teaspoon cayenne pepper

1 pound large shrimp, peeled and deveined

1 pound lump crabmeat, picked over to remove any pieces of shell

cooked white rice and sliced green onion for serving


Add butter and vegetable oil to a large Dutch oven. Heat over medium heat. Once butter is melted, add flour. Cook and stir for 5 minutes, or until mixture turns a caramel color.

Add onion, celery, and geen pepper. Cook for 4 minutes, stirring often.

Add garlic and cook for 1 minute.

Stir in chicken broth and wine. Add the next 8 ingredients. Simmer for 10 minutes.

Stir in shrimp. Cook for 2 minuutes.

Stir in crab. Cook for 3 more minutes.

Serve with rice and top with green onion.


**recipe adapted from Spicy Southern Kitchen

Sunday, November 22, 2020

Sous Vide Lamb Chops


For Father's Day this year, the kids and I gave David a sous vide machine.  We weren't familiar with this cooking method until earlier this year, but apparently it has been around for quite awhile now.  For those of you who don't know what sous vide is, here's Wikipedia's definition: 

Sous vide (/suĖĖˆviĖd/; French for 'under vacuum'), also known as low temperature long time (LTLT) cooking, is a method of cooking in which food is placed in a plastic pouch or a glass jar and cooked in a water bath for longer than usual cooking times (usually 1 to 7 hours, up to 72 or more hours in some cases) at a precisely regulated temperature.

The temperature is much lower than usually used for cooking, typically around 55 to 60 °C (130 to 140 °F) for meat, higher for vegetables. The intent is to cook the item evenly, ensuring that the inside is properly cooked without overcooking the outside, and to retain moisture.  For meats, most likely you'll want to sear for a few minutes on each side at the end to help retain all of the meat's juices and to give it a crisper finish.

David had tried to replicate the method on his own by using a cooking thermometer and adjusting the heat as needed, but it was a bit of a hassle.  Using the sous vide machine makes it almost effortless to achieve the best cooked meats we've ever had.  The machine itself is a small, tubular device and you attach it to the side of a large pot filled with water about halfway full.  They can get pricey, but you can find one for around $80.  The brand we have is "Joule" and it can be controlled with your iPhone and is about in the middle of the road as far as the price.

Recently David cooked up the absolute best lamb chops I've ever eaten, sous vide style.  He got the chops from Central Market, so they were excellent cuts of meat and not crazy expensive.  Sometimes lamb can be a little gamey, but these weren't in the least.  The meat was cooked to perfection, tender and juicy.  We always serve our lamb chops with mint jelly as a condiment.  It adds a nice hint of sweet with the savory chops.  

We're cooking up just about everything using our nifty, new, little toy.  Keep an eye out for more sous vide recipes because we're obsessed.  These are by far the best lamb chops we've ever had whether it be in a restaurant or at home.

8 lamb chops
2 TBSP freshly cut tarragon
1 - 2 TBSP fresh thyme
Handful of fresh basil leaves
Handful of fresh Rosemary sprigs
4 cloves garlic, minced
1 stick of butter, room temperature
1/2 tsp salt
1 tsp fresh ground pepper
1 TBSP olive oil
Mint jelly (to serve as an accompaniment to the chops)

Mix tarragon, thyme, basil, garlic, salt, pepper and butter.  Apply a schmear of the herb butter on both sides of each chop.  Put a sprig of rosemary on top and bottom of each chop.  Wrap each chop with a few fresh basil leave before placing in a sous vide bag, 2 chops per bag.  Vacuum seal and repeat with remaining chops.

Place chops in pot of water and turn on sous vide machine.  Cook for an hour to an hour and a half at 131 degrees Fahrenheit for a tender and juicy chop.

Once finished cooking, remove all of the chops from the bags, baste lightly with olive oil and sear at high heat in a cast iron skillet for 2 minutes per side.  Serve with a sprig of fresh rosemary on top.  

Notes:
A trick we learned, is that you can use Ziploc freezer bags if you don't have a vacuum sealer.  To ensure you get most of the air out, place the meat or veggie in the bag, submerge the open bag slowly in a pot of water.  As you do that the air is forced out by the pressure of the water.  Seal the bag when the water is almost reaches the top of the bag, not allowing water in.


Thursday, November 19, 2020

Slow Cooker Oxtail Stew


Like so many, I'm visually impaired without my glasses, and often times I'll come home after a grocery shopping spree with many of the wrong items because I'm guilty of not wearing my glasses.  Recently, I went to the store and thought I was grabbing soup bones to make our infamous beef pho, but grabbed oxtails instead.  After doing a little research, I learned that oxtail are a more pricey cut of beef, similar to that of short ribs in that they're just as rich and meaty...perfect for soups and stews.  I learned oxtails are popular in South American traditional recipes.  I decided to save them and create something fabulous for another day.  I love getting out the slow cooker, especially when it starts getting colder out and you can feel Fall in the air.  I looked high and low for the perfect recipe for these meaty bones, and this recipe, with a few minor tweaks, was out of this world delicious.  It made the house smell divine.  My Mother-in-Law, Sara suggested serving this over some mashed potatoes, which would be incredible.  Of course, you have to serve this with a good, crusty bread too.  

2 tablespoons olive oil
Salt and black pepper to taste
4 – 5 lb Oxtail
2 medium leeks, sliced (white and light green parts only) 
1 onion, chopped
6 garlic cloves, minced
1 cup red wine
1 can plum tomatoes
5 tablespoons tomato paste
3 cups beef stock
1 tablespoon Worcestershire sauce
2 sprigs of fresh thyme
2 sprigs of fresh rosemary
2 bay leaves
2 sticks of celery, sliced
4 medium carrots, sliced
3 medium potatoes, peeled and chopped
¼ cup all-purpose flour
1 cup frozen peas
Fresh chopped parsley to garnish (optional)


In a large skillet, heat the oil over medium-high heat.

Salt and pepper the oxtail and add to the skillet and sear on each side for 2-3 minutes.

Transfer beef to the slow cooker.

Add leeks, onion, garlic, red wine, plum tomatoes, tomato paste, beef stock, Worcestershire sauce, thyme, rosemary, and bay leaves.

Cover and cook on low for 4 -6 hours or high for 2 -3 hours, or until the meat falls away from the bone.

Strip the meat from the bones and discard the bones and any excess fat. 

Add carrots, celery, and potatoes. Cover and cook on high for 3 hours, or until vegetables are fork-tender. Taste and add more salt and pepper if necessary.

In a small bowl, whisk together flour and 1/2 cup stew broth. Stir in flour mixture into the slow cooker along with the frozen peas. Cover and cook on high heat for an additional 30 minutes, or until thickened.

Serve immediately, garnished with parsley, if desired.

Notes:
I sometimes substitute green onion for leeks

**Recipe adapted from Mommys Home Cooking

Sunday, November 15, 2020

Copycat Starbucks Banana Bread


There's something to delight all of the senses about having banana bread baking in the oven.  Especially on a cold, cozy morning with a crackling fire in the fireplace..."kids" sleeping in, awaking to the lovely aroma of freshly baking, banana bread in the air.  I usually make this recipe a few times over the holidays.  Who doesn't love Starbuck's Banana Bread!?

2 cups flour
1 teaspoon baking soda
¼ teaspoon salt
1/2 teaspoon cinnamon
1 egg
1⅛ cup sugar
½ cup vegetable or canola oil
2 tablespoons buttermilk or milk
½ teaspoon vanilla
3 bananas mashed very well
½ cup chopped walnuts (optional)

Preheat oven to 325 degrees.  Spray a 8x5 loaf pan with non stick spray and line it with parchment paper if desired.

Add flour, baking soda, salt and cinnamon to a small bowl and set aside.

Mix egg, sugar and oil and stir until well combined.

Add the dry ingredients to the wet and stir well. The mixture will be thick and dry.

Next add milk, vanilla and bananas and stir until incorporated.
Mix in walnuts and pour into a loaf pan.

Cook 50-75 minutes, checking regularly until a knife comes out clean.

Notes:
The success of banana bread depends on bananas.  You really want super ripe or slightly brown bananas for the best flavor.  If your bananas are fresh you can place them in a brown paper bag closed tightly for a day or two to help them brown, keep them attached at the stem for faster ripening or if you need them brown right away, place them in a 300 degree oven for 30 minutes and then let cool for 30 minutes.  Be sure to place foil or parchment under the bananas before popping them in the oven as they may leak a tiny bit.

If you want an authentic Starbucks experience, add nuts to the dough and sprinkle on top as well.

You can make your own buttermilk by adding 1/2 tablespoon white vinegar or lemon juice to 1/2 cup milk let set for 5 minutes.

Friday, November 6, 2020

Stir-Fried Baby Bok Choy


\\


Baby Bok Choy is our newest favorite veggie.  We've been including it in our pho, stir fries and of course, our gurgling hot pots.  This recipe in particular is a new addition to our repertoire.  It's super easy to prepare and is full of crunchy goodness.  Enjoy!

1.5 lbs (about 4) Baby Bok Choy, halved with bottoms trimmed
4 tbsp toasted sesame seed oil
4 garlic cloves, minced
3 tbsp soy sauce (or tamari or coconut aminos)
1/2 tsp salt
1/4 tsp pepper
1/2 tsp red pepper flakes
2 tbsp water
black and white sesame seeds
  
In a large wok or skillet, heat sesame oil over medium high heat. Working in small batches, add in bok choy cut side down until lightly browned. Remove from pan and continue until all bok choy has been used.

Once it’s all been browned, add all of the bok choy back to the pan along with the minced garlic and cook 2 more minutes, stirring frequently. Add soy sauce, salt, pepper, red pepper flakes and water. Bring to a simmer, stirring bok choy until well-coated. Cook for another 2 minutes and remove from heat. Top with sesame seeds and more red pepper flakes before serving. 

Note: 
The BBC is done when the dark green leaves are wilted and light green stalks are tender, but still have a slight crunch.
**This recipe is adapted from TheModernProper.com